Exposed Gradient for shaders in Unity
Jun 21, 2024

Exposed Gradient for shaders in Unity
Gradients are readily available as a node in Unity's Shader Graph. However, one significant limitation is that they cannot be exposed, meaning each material cannot have its own unique gradients. This drawback has been a persistent frustration for me. Fortunately, I discovered a solution that is both effective and easy to implement, and I'm excited to share it with you today!
The Solution
Instead of using Unity's built-in gradients, utilize a gradient texture in your shader. By sampling this texture, you can derive colors for your grayscale textures. Here's a step-by-step guide on how to achieve this:
Step 1 : Creating the shader
To create an unlit (or lit) Shader Graph shader, follow these steps:
Expose the Gradient Texture:
Add the gradient texture as an exposed texture parameter in your Shader Graph.
Pass the Grayscale Texture:
Add the main grayscale texture as another exposed texture parameter.
Get the Grayscale Value:
Extract the grayscale value from your texture (any float value from 0 to 1 works).
Create a Vector2 Node:
Plug the grayscale value into the x-axis of a Vector2 node.
Add and Sample the Gradient Texture:
Add your gradient texture and sample it like a normal texture.
Ensure the texture is set to clamp mode to prevent values less than 0 or greater than 1 from wrapping around.
Connect the UVs:
Connect the Vector2 node to the UV input of the gradient texture sampler.
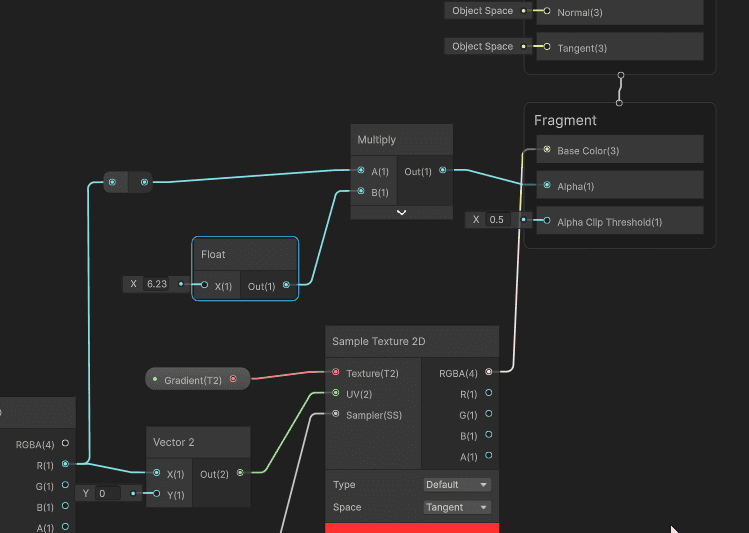
And voila! You've sampled the gradient, and now you can use its output as the color for your shader. Here’s a picture example:
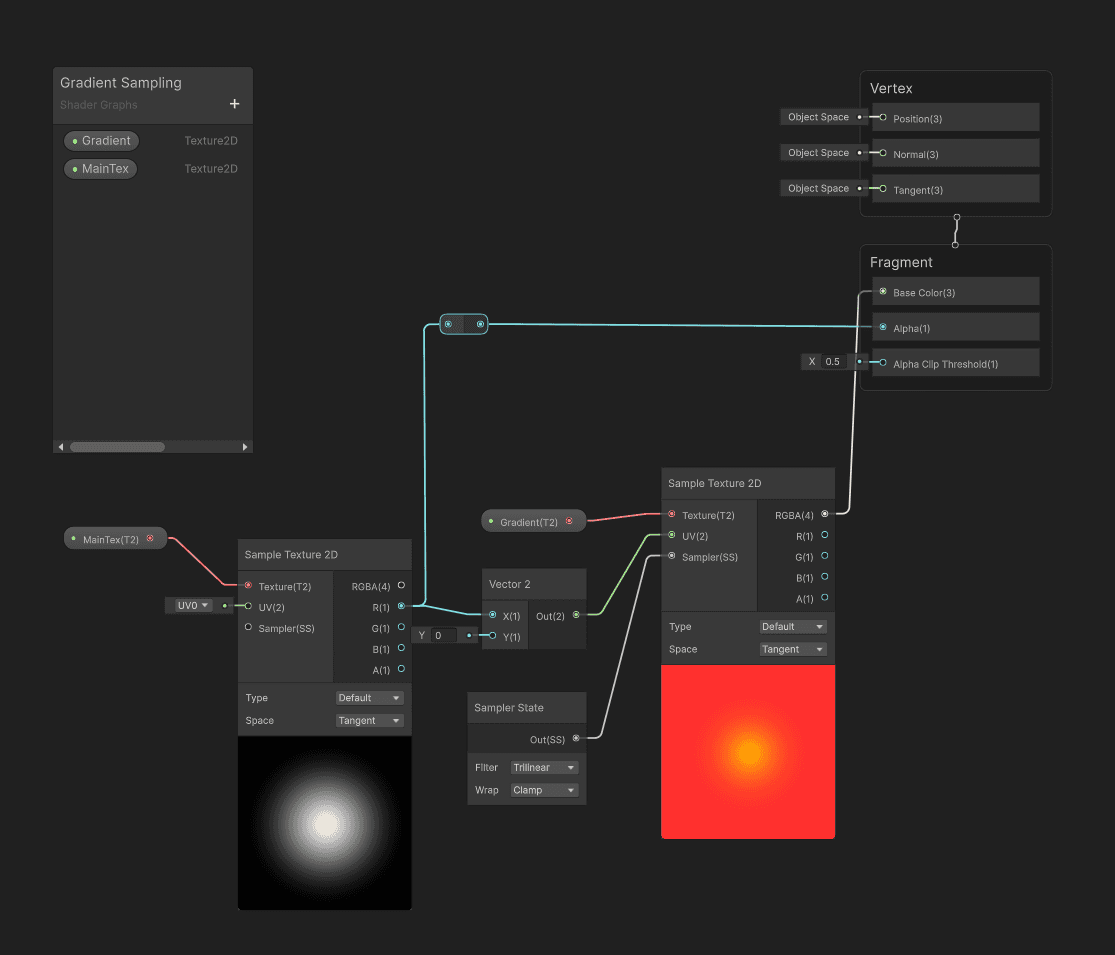
Then, all we need to do is create a material from this shader and use a gradient texture. The higher the width resolution of the gradient texture, the better the sampling quality. You can use an existing gradient texture or create your own using Photoshop, GIMP, or Figma, which I prefer for creating my gradients.
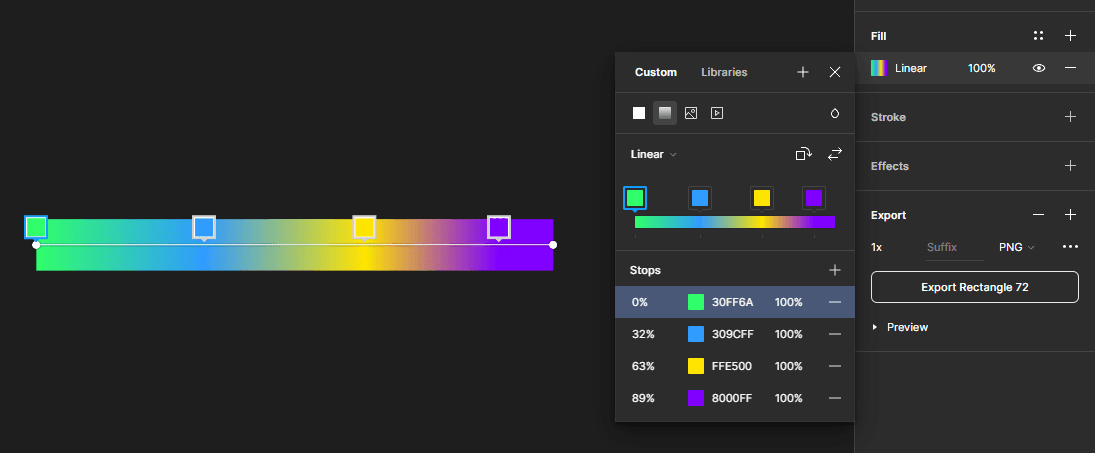
Next, simply assign your gradient texture to the gradient texture parameter in the material.

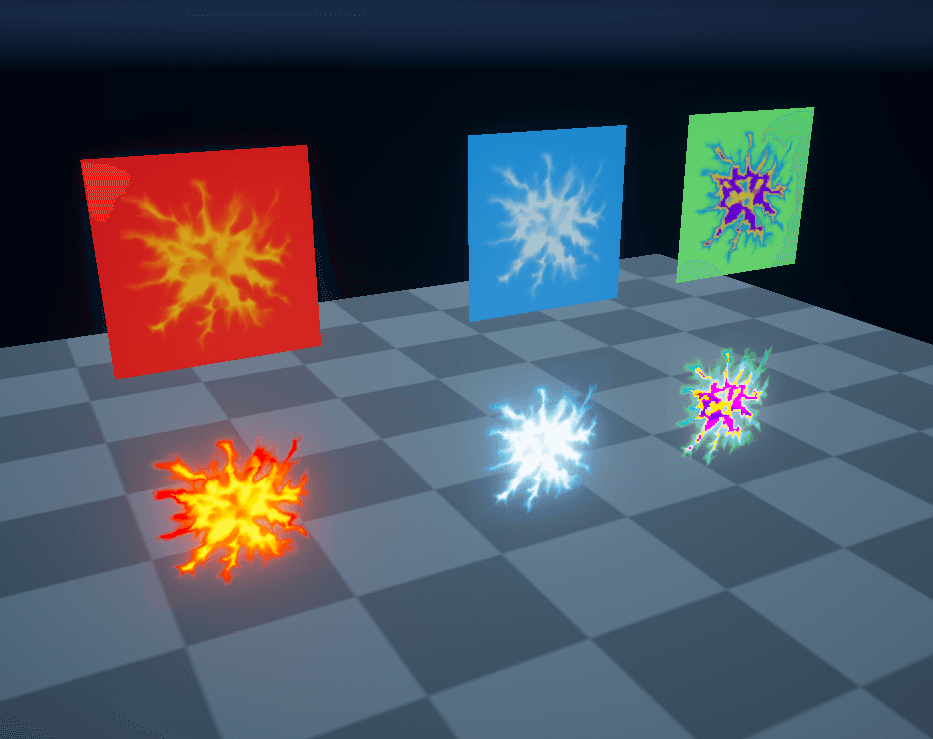
you can have your material be opaque or transparent, but transparent gives better results in my opinion
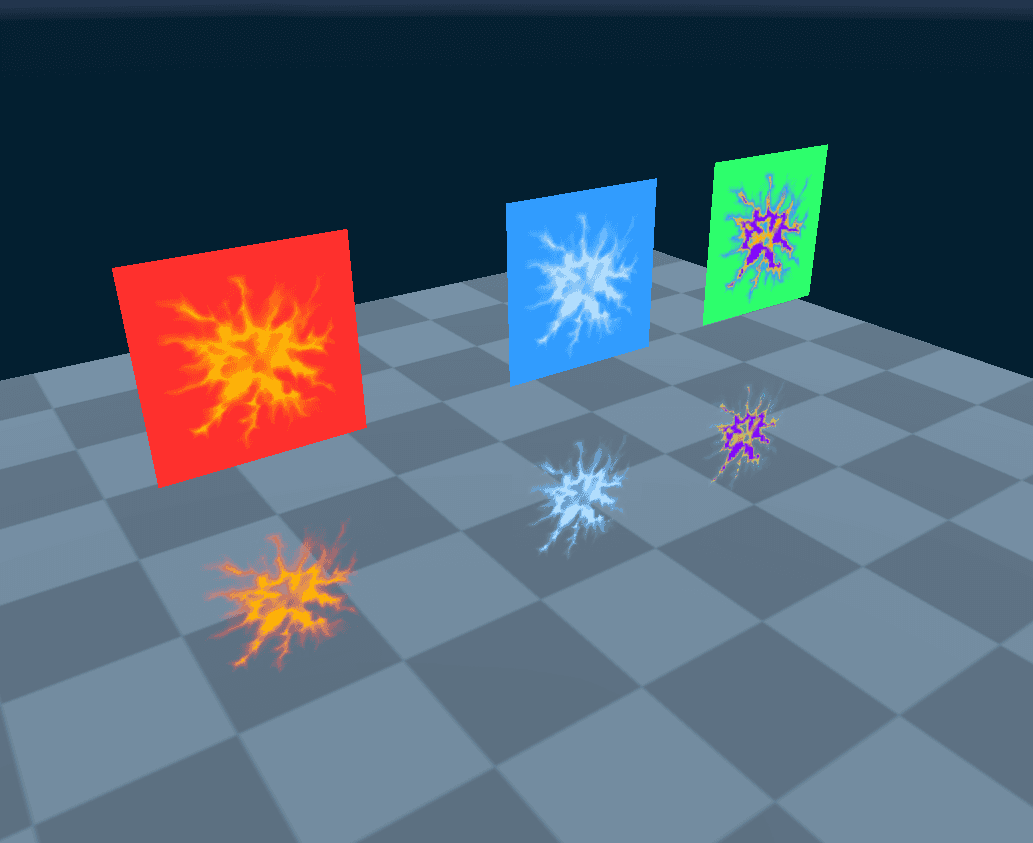
after adding postprocessing with bloom,you can also multiply the alpha value to add more bloom effect and make look "lit"
and we are done !, feel free to share this blog post with your fellow shader artist, and crediting me will also be much appreciated (not necessary though), make sure to also check my projects in this website to see more cool vfx i made !.